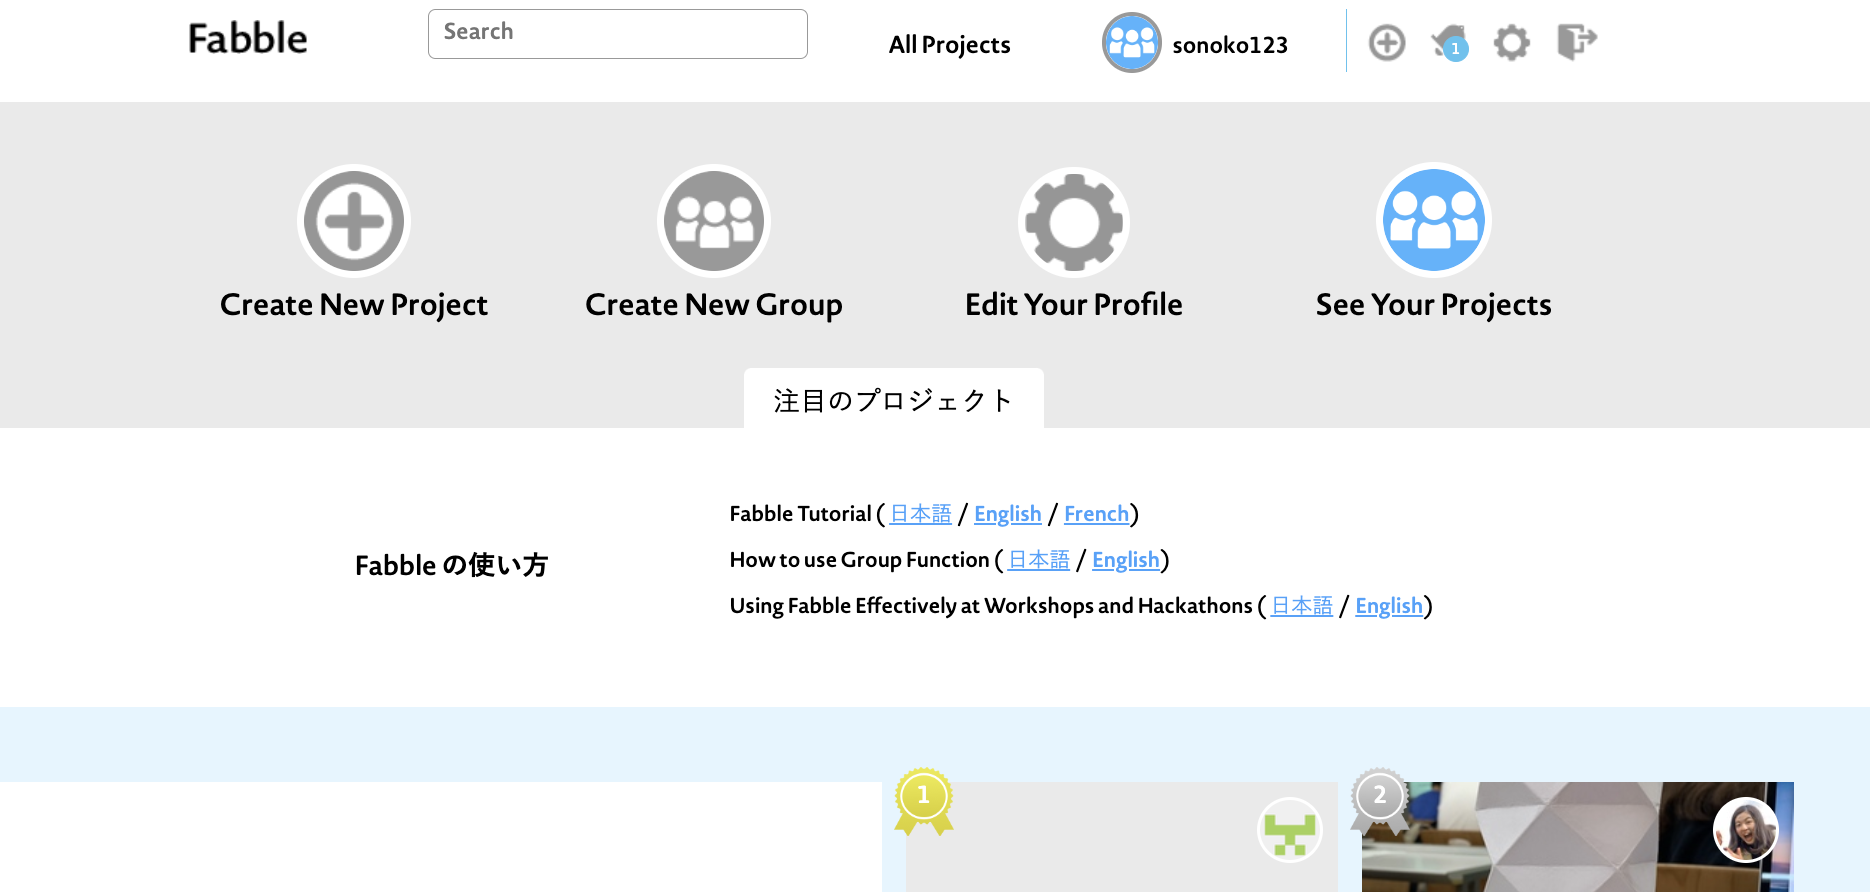
Create a Fabble account (if you don't have one)
Create an account from "Sign up for Fumble".
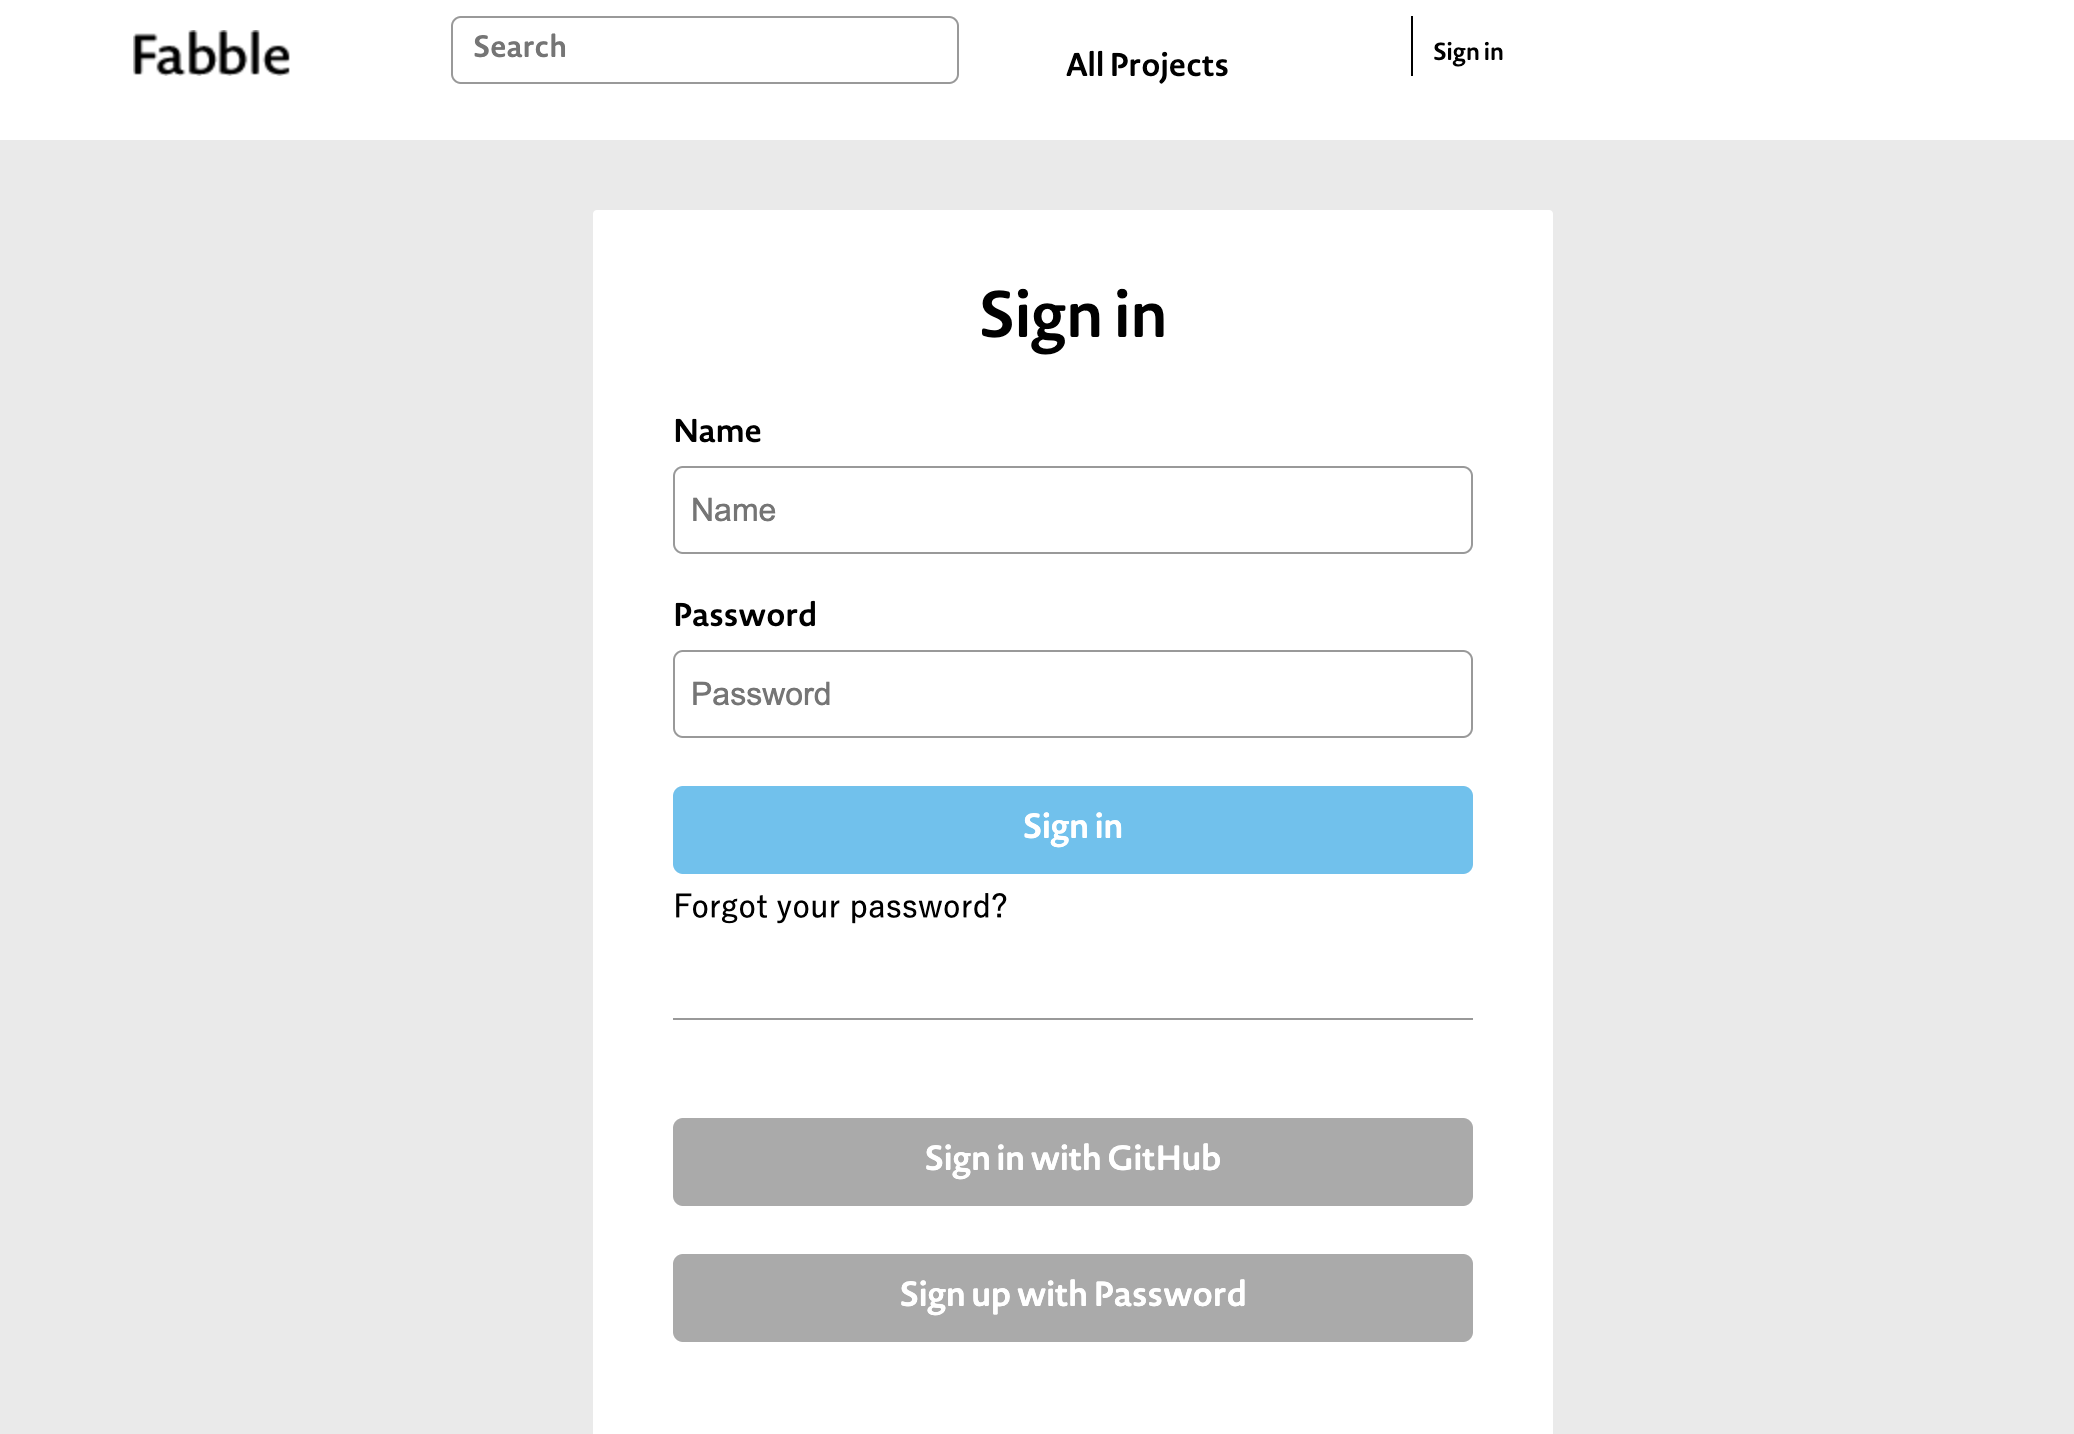
If you don't have a Git Hub account, Sign up with Password
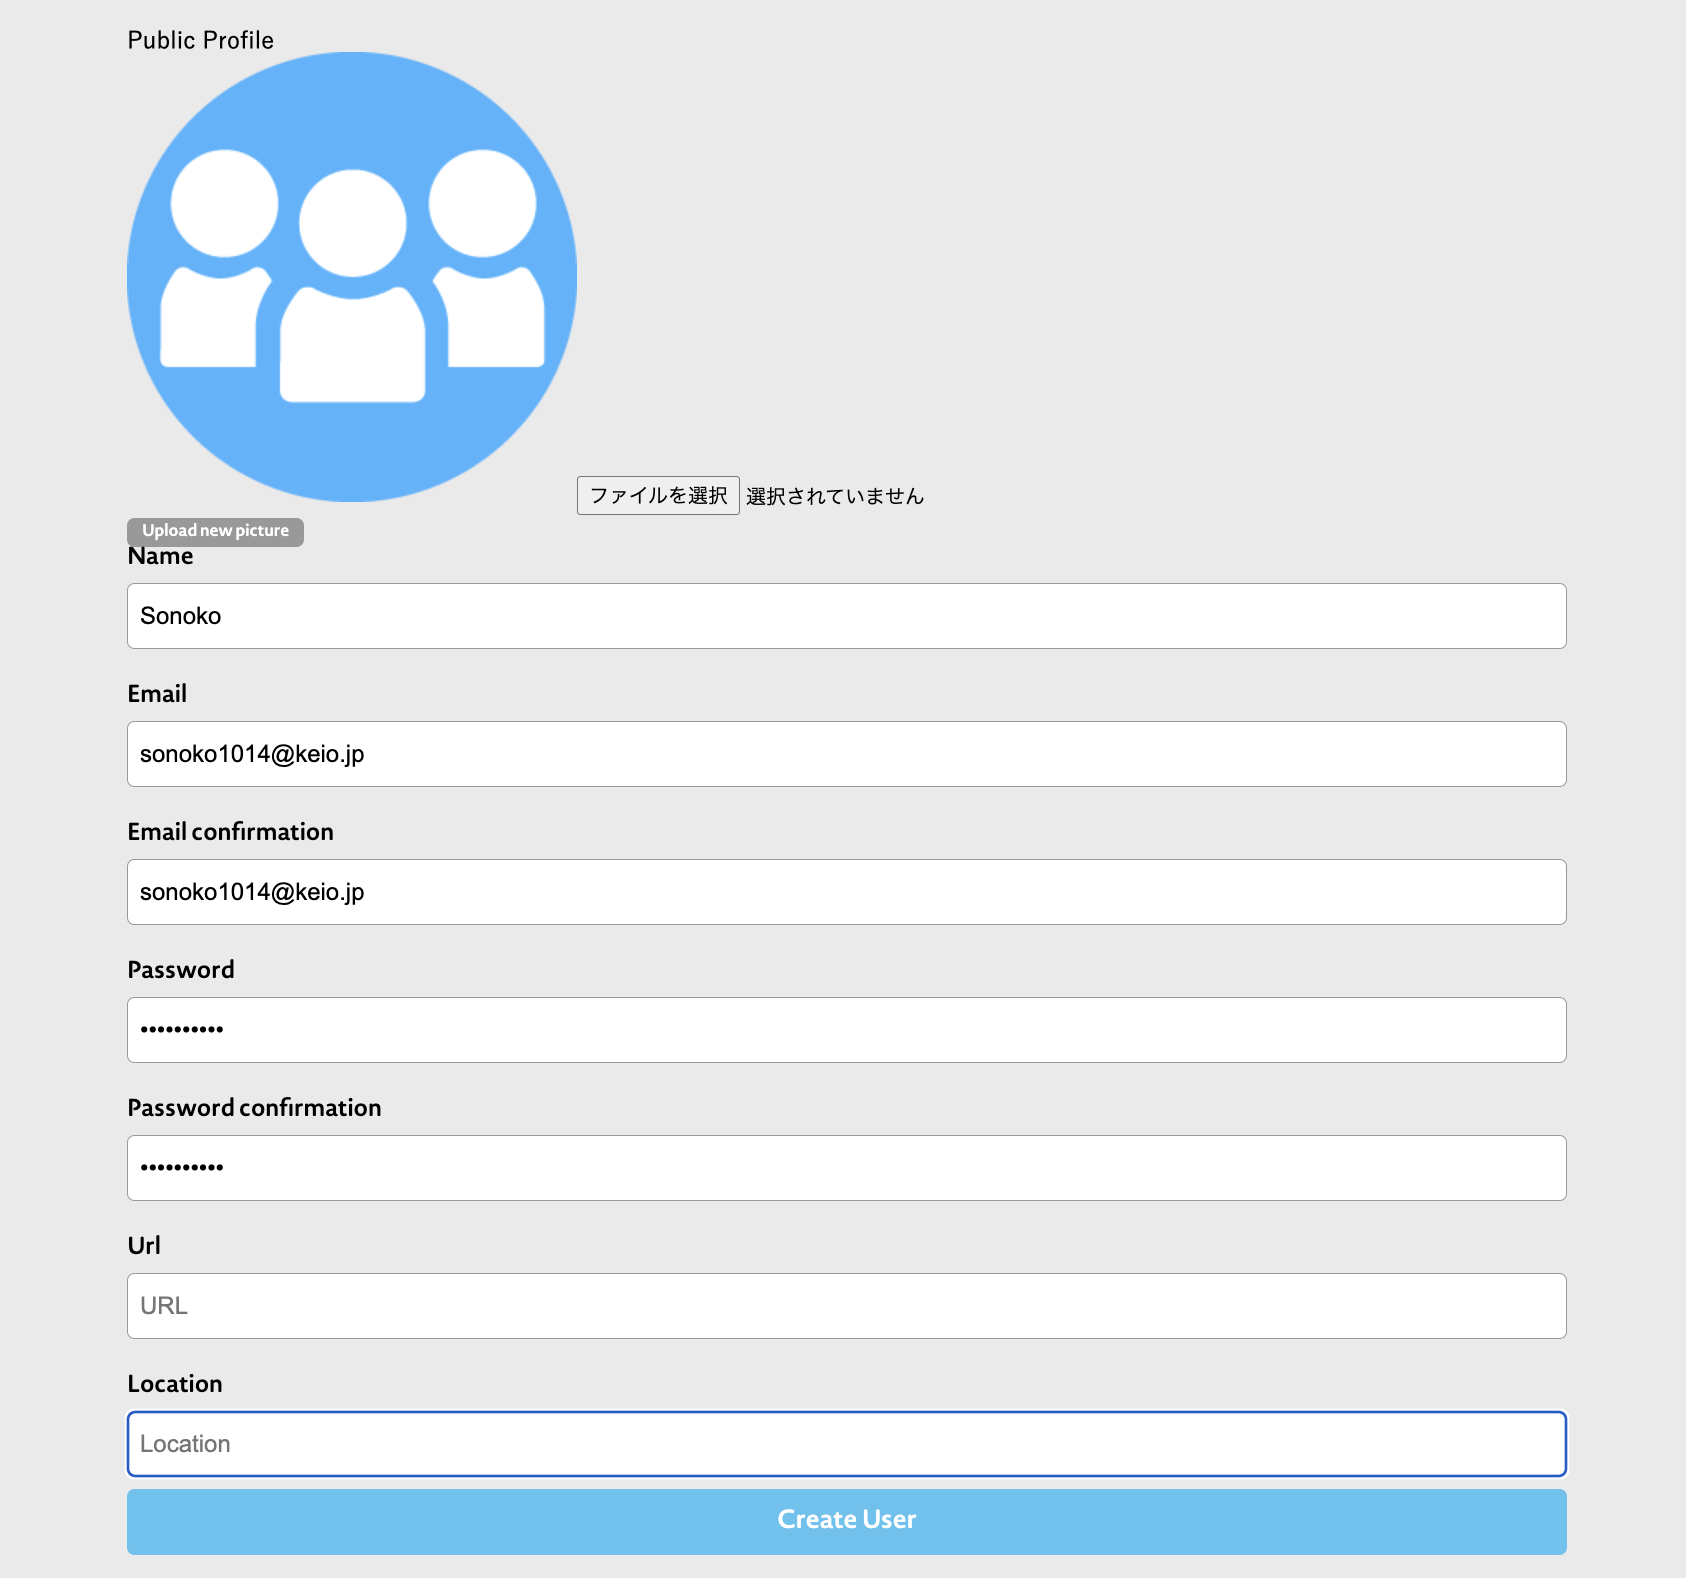
Username *Half-width alphanumeric characters. If you enter a name that has already been registered by someone else, an error message will appear. Do not include any spaces in Name.
Email 2 times
Password 2 times
Others are optionally registered.
Password 2 times
Others are optionally registered.
Confirm your account and username

Remember your username.
Now give your project host your username and ask them to invite you as a collaborator on the project.
If necessary, you can create groups and proceed as follows (usually skip).
Now give your project host your username and ask them to invite you as a collaborator on the project.
If necessary, you can create groups and proceed as follows (usually skip).
About the group
If you create a group, you can edit the project by group. Also, as a collaborator (co-editor), you can grant editing privileges to group members in bulk.
You can designate individual accounts as collaborators, but creating groups makes it easier to manage.
You can designate individual accounts as collaborators, but creating groups makes it easier to manage.
Create new group

New groups can be created from your account settings page. A group name is required. After creating, add members from the bottom of the screen.
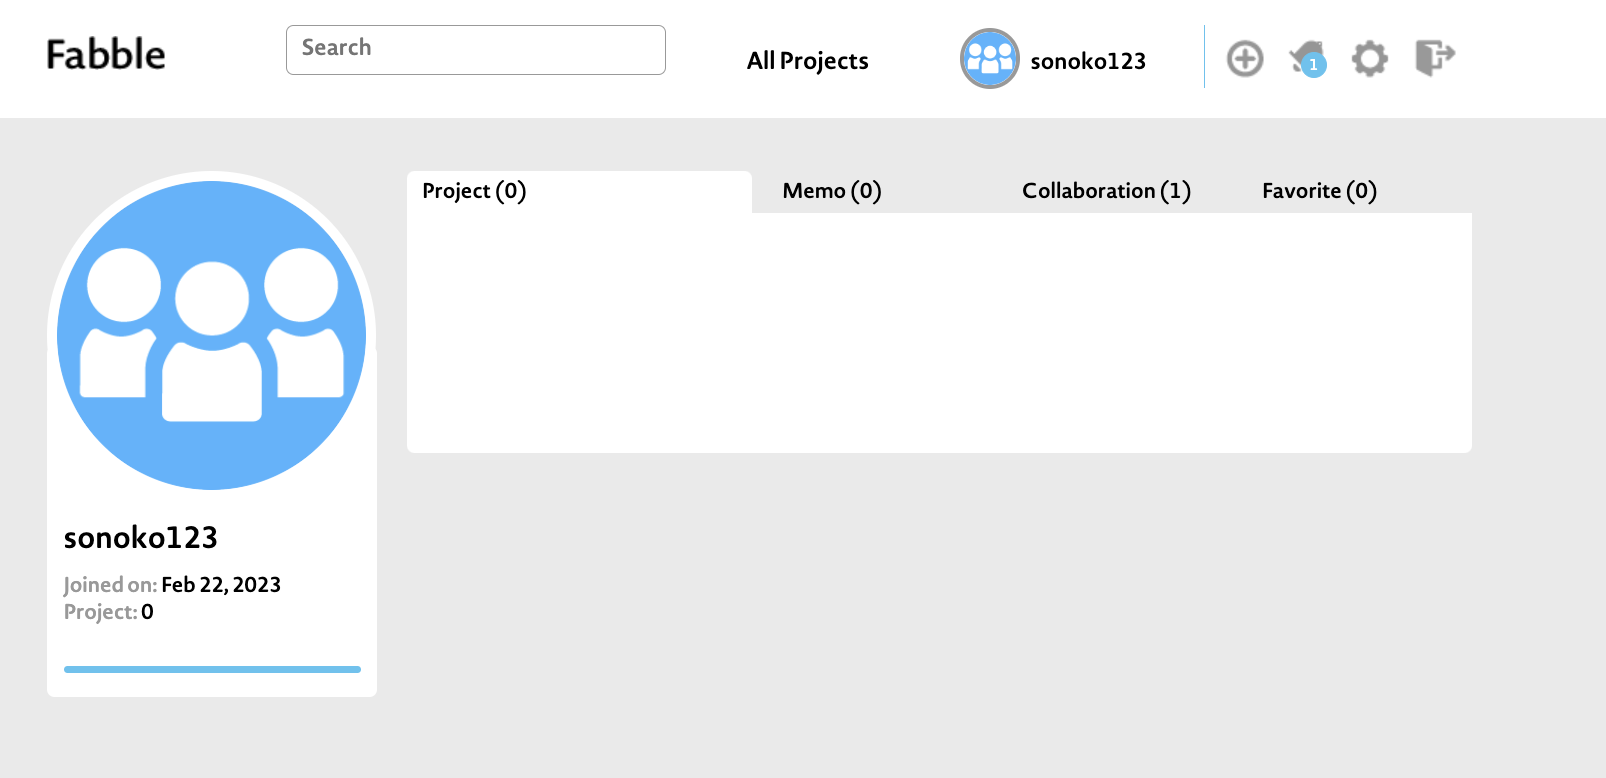
About my page
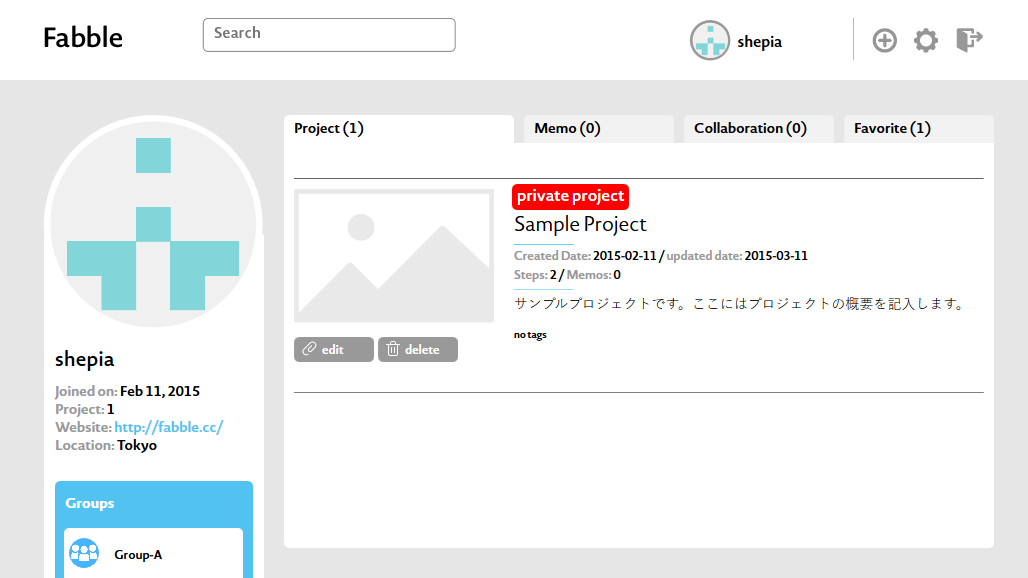
Projects that you manage are displayed on the "Project" and "Note" tabs on My Page, and projects that you are a collaborator on are displayed on the "Collaboration" tab.
If the group is an administrator/collaborator, it will be displayed on the group page instead of My Page.
If the group is an administrator/collaborator, it will be displayed on the group page instead of My Page.
join the project
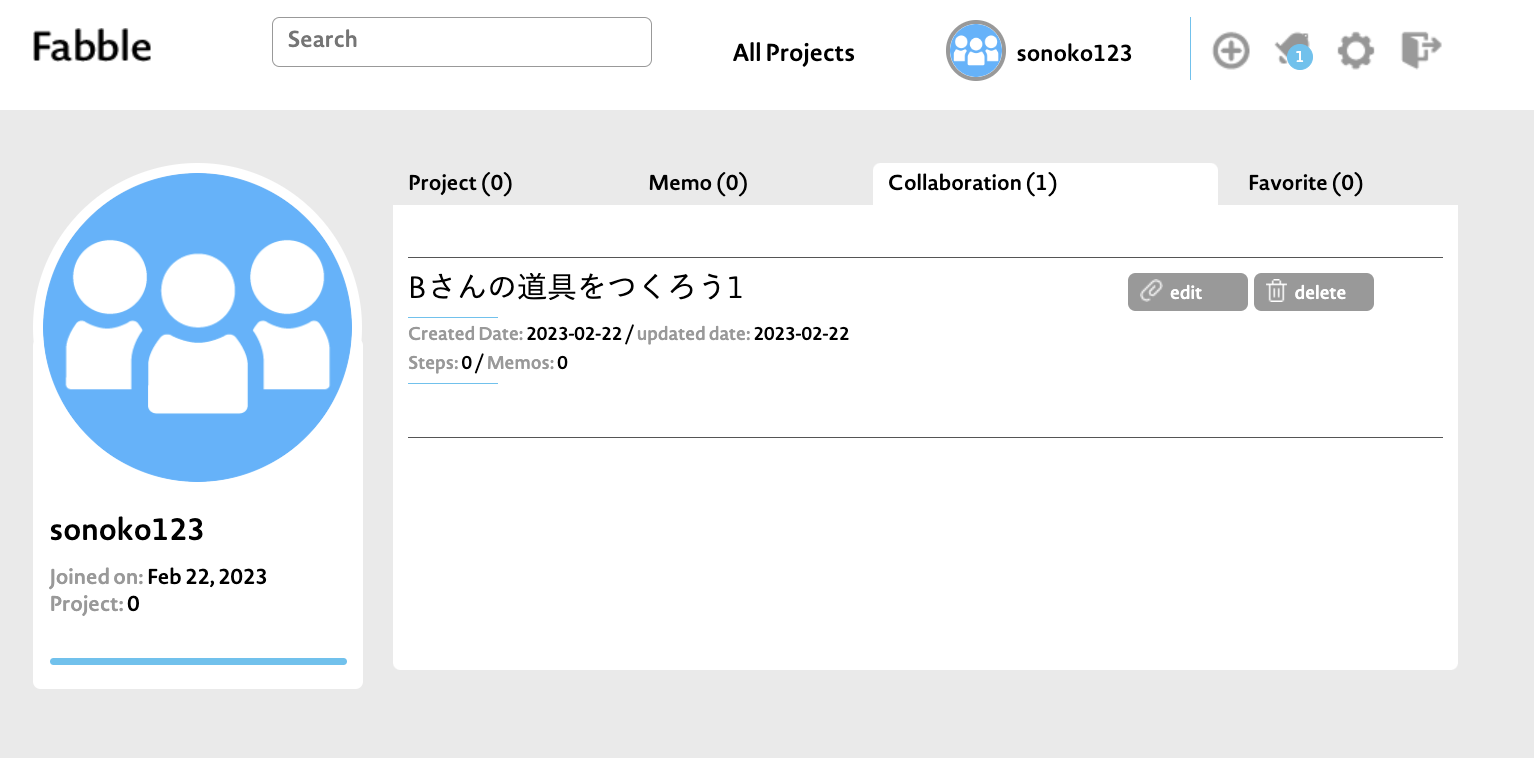
Click on your username to see a list of projects you've created and projects you've been invited to.
When you are invited, there will be a number in "Collaborator", so click on it.
Select the project to participate in and edit it with "Edit".
When you are invited, there will be a number in "Collaborator", so click on it.
Select the project to participate in and edit it with "Edit".
Use the project
You can use other users' projects as follows.
Editing tags
Project tags can be freely added or changed by any user. You can now search by tag from the search box. It's great for series projects, organizing your work for an event, or for simple categorization.
Add to Favourites
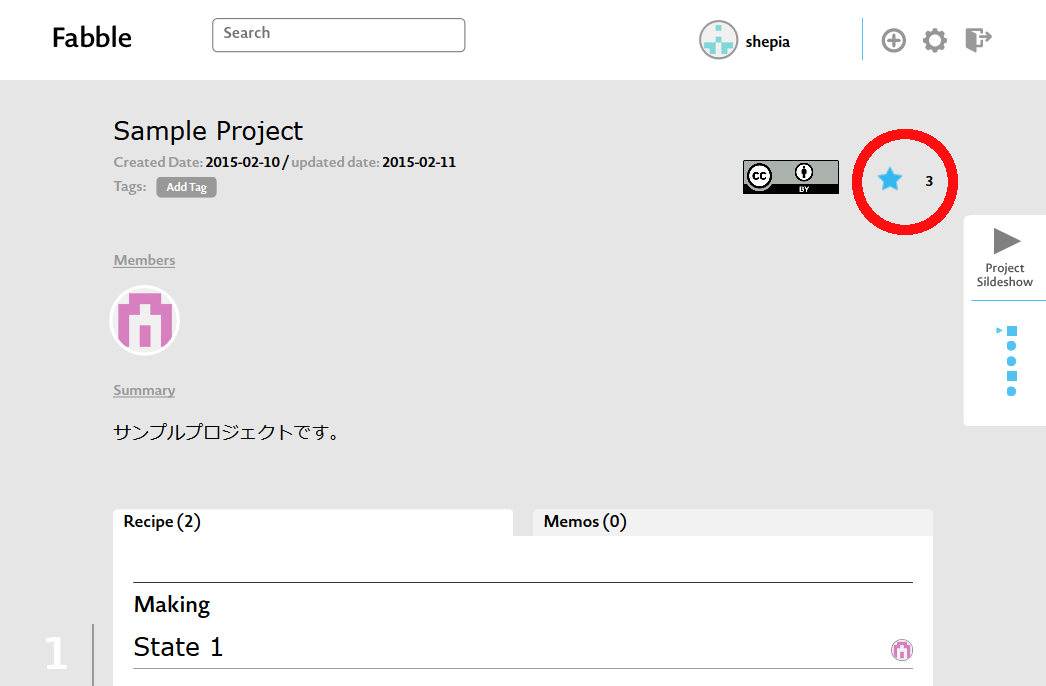
You can add a project to your favorites by starring it. Pages added to your favorites here can be viewed on the "Favorite" tab of My Page. If you save a project that you are interested in as a favorite, it will be easier to find it later.
Add comments
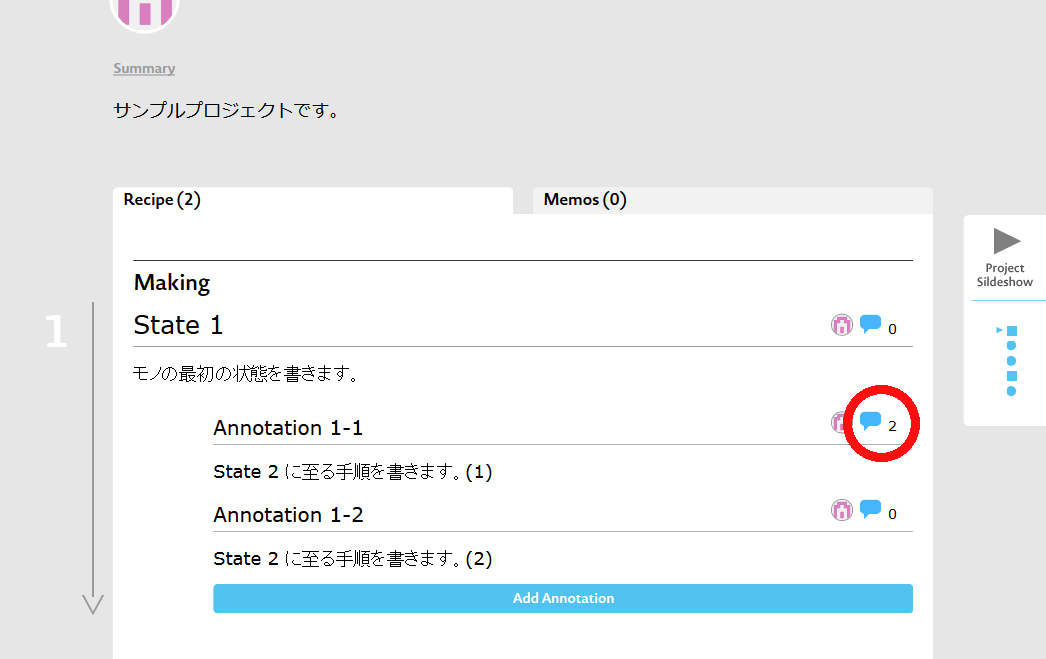
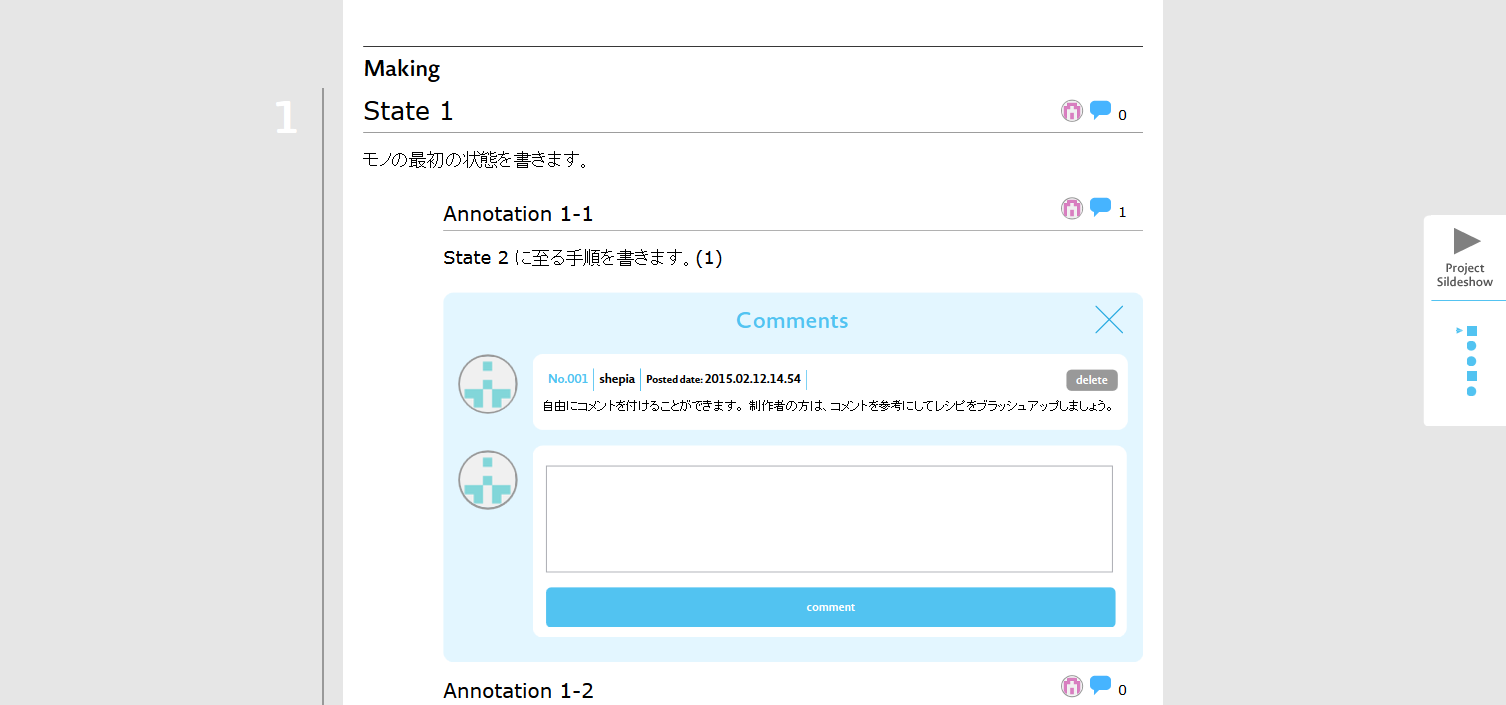
Anyone who is logged in can freely add comments.
The producer should brush up the recipe by referring to the comments.
The producer should brush up the recipe by referring to the comments.
View slideshow
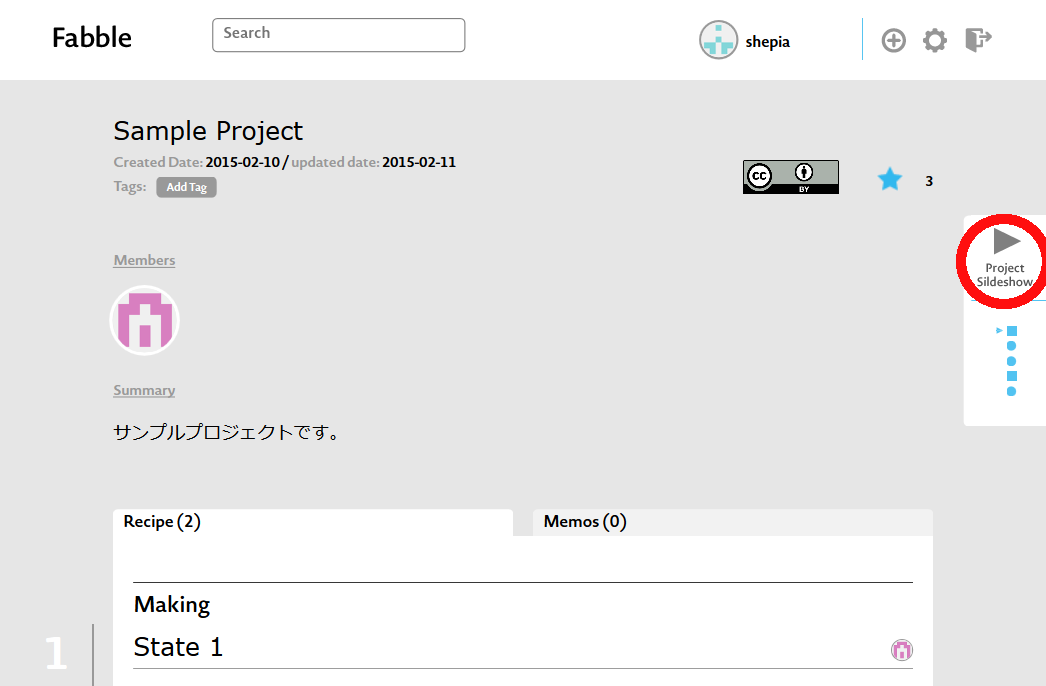
Recipes can be browsed in slideshow format.
Set project settings
All of these settings can be changed later.
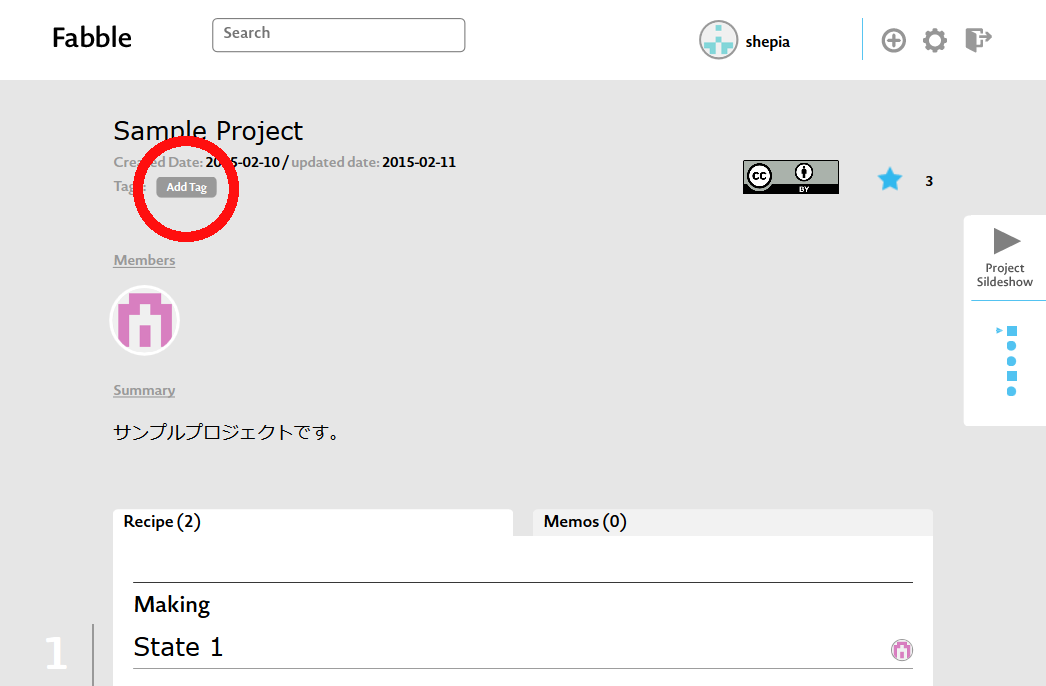
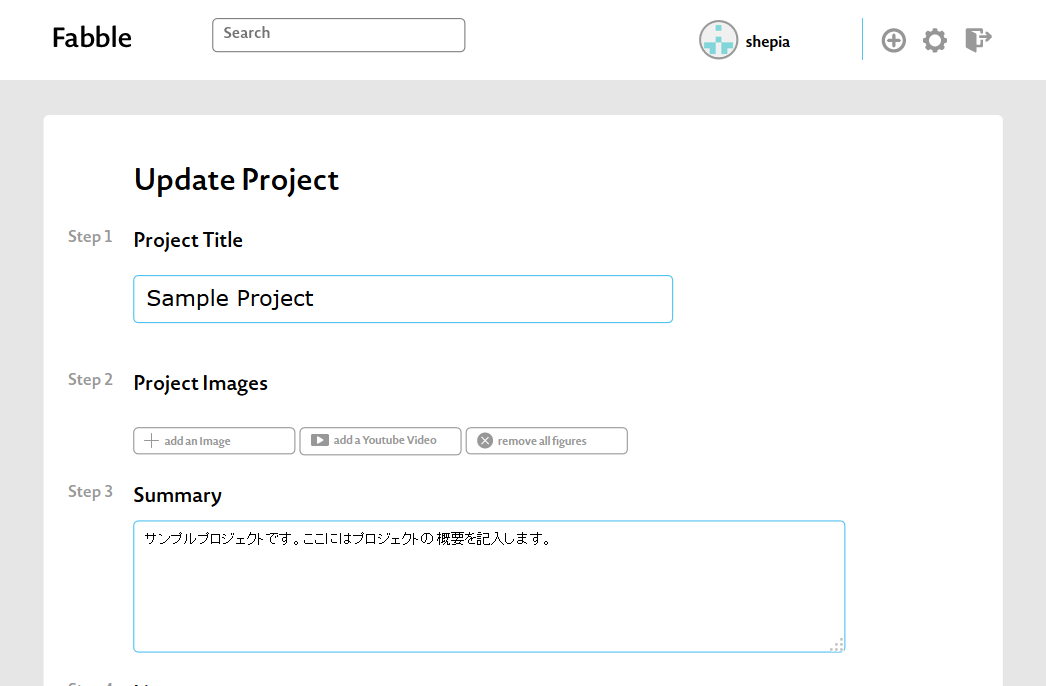
Step 1 : Project Title
Enter a project title of up to 30 characters.
Step 2 : Project Images
You can set a thumbnail image for your project.
Step 3 : Summary
Write an overview of what you are creating. It is a good idea to include the tools and materials you use.
The text entered here will be displayed in the headline.
The text entered here will be displayed in the headline.
Step 4 : License
All projects on Fabble are licensed under the Creative Commons License.
Please select the type of license to apply.
Please select the type of license to apply.
Step 5 : Access level
If you select Private Project, it will not be viewable by other users.
If unchecked, the project will be published from the moment it is created.
If unchecked, the project will be published from the moment it is created.
Step 6 : Permalink
Sets the URL of the project page.
You can freely change the URL entered by default.
You can freely change the URL entered by default.
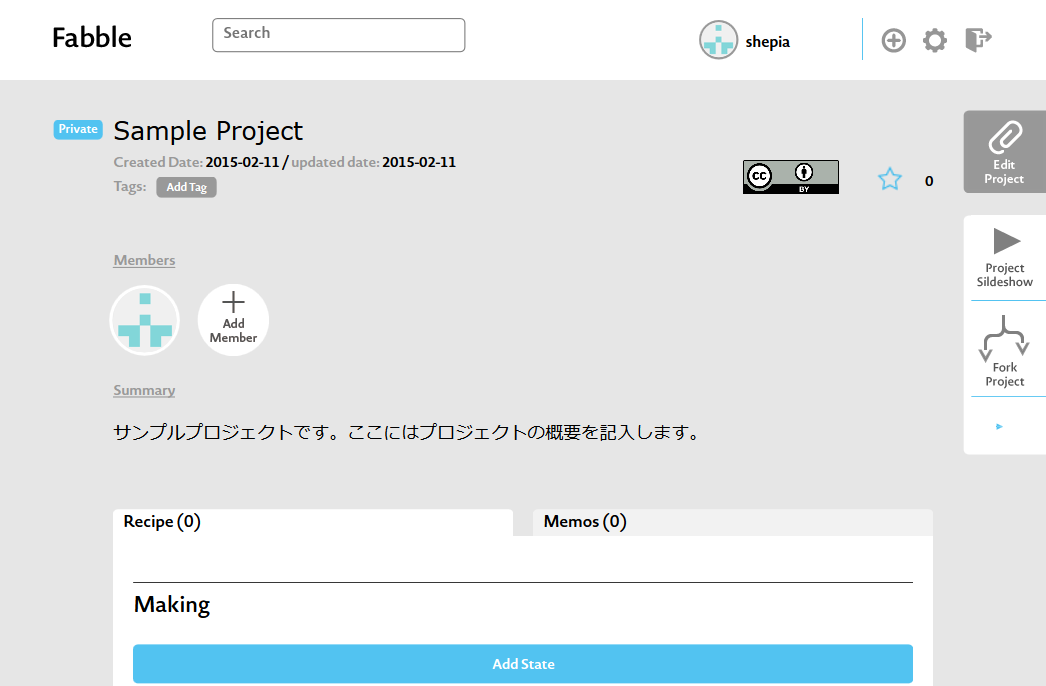
How to write a project
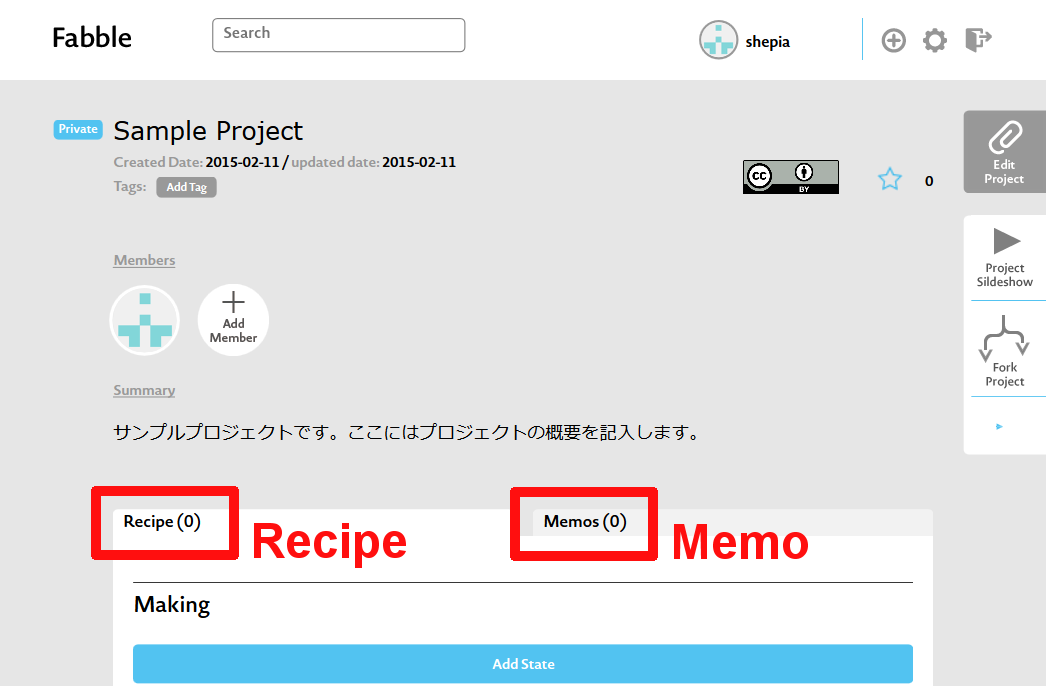
A project consists of two description formats, Recipe and Memo.
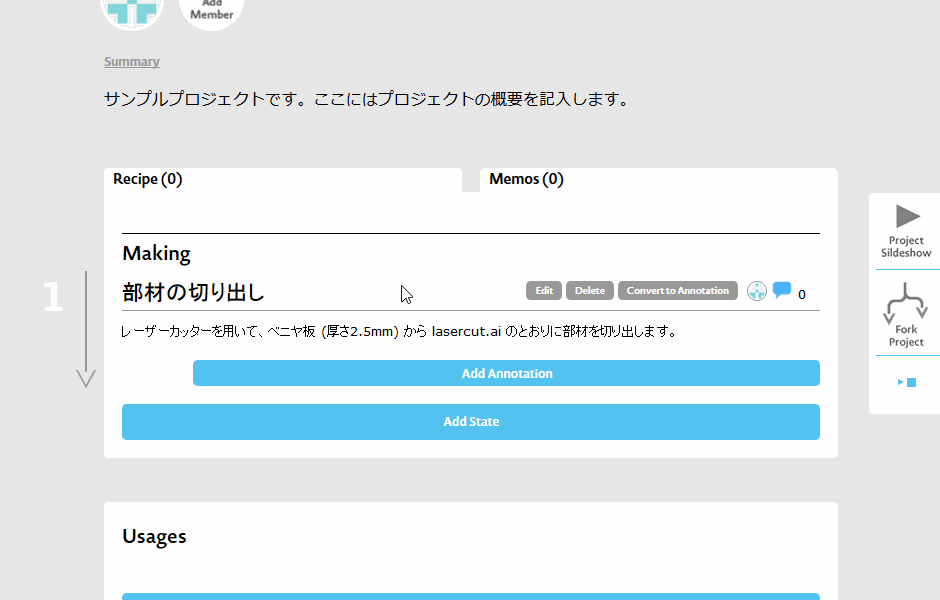
What is Recipe
The recipe describes the manufacturing process and the materials, tools, and blueprints required for it.
The procedure written here may eventually be forked by others (creating something else based on something), and it may become the seed of a new project.
The procedure written here may eventually be forked by others (creating something else based on something), and it may become the seed of a new project.
What is Memo
In Memo, you can write down the production process and production memos. His role in Memo is to document and share the stories behind making things.
Write about why you decided to make this, what went well and what didn't go well, and share the time and decisions you make.
Write about why you decided to make this, what went well and what didn't go well, and share the time and decisions you make.
Actual use
Of course, there is no problem with just Recipe or Memo.
If working in a group, it might be easier to divide the work between the person doing the production and the person recording on her Fabble.
If working in a group, it might be easier to divide the work between the person doing the production and the person recording on her Fabble.
Write a recipe
A recipe consists of a sequence of states that describe what the state of a thing is. The steps from one state to the next are described as Annotations.
Or you can simply use State as the main heading and Annotation as the subheading.
Or you can simply use State as the main heading and Annotation as the subheading.
Material/tool/design file markup
If "material name", "tool name", and "blueprint data" appear in the description, use the markup tool and assign them to "Material", "Tool", and "Blueprint". Each file can be uploaded and linked. These are automatically listed at the top of the recipe.
140 character limit
State and Annotation have a character limit of 140 characters.
In order to communicate effectively, it is a good idea to include images such as photos, screenshots, and YouTube videos in short sentences.
In order to communicate effectively, it is a good idea to include images such as photos, screenshots, and YouTube videos in short sentences.
Text decoration
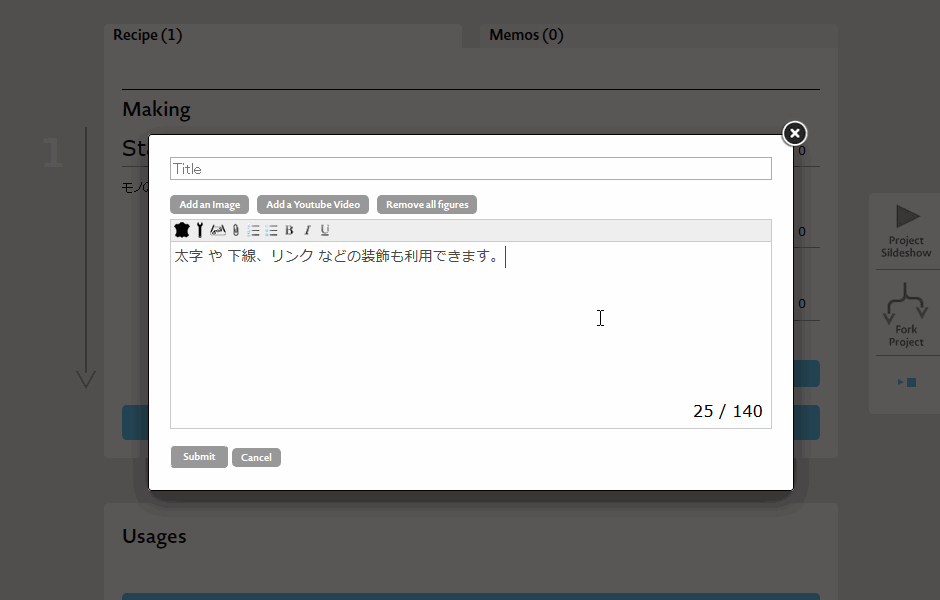
You can use decorations such as bold, italic, underline, links, and bullets in the text.
Change order
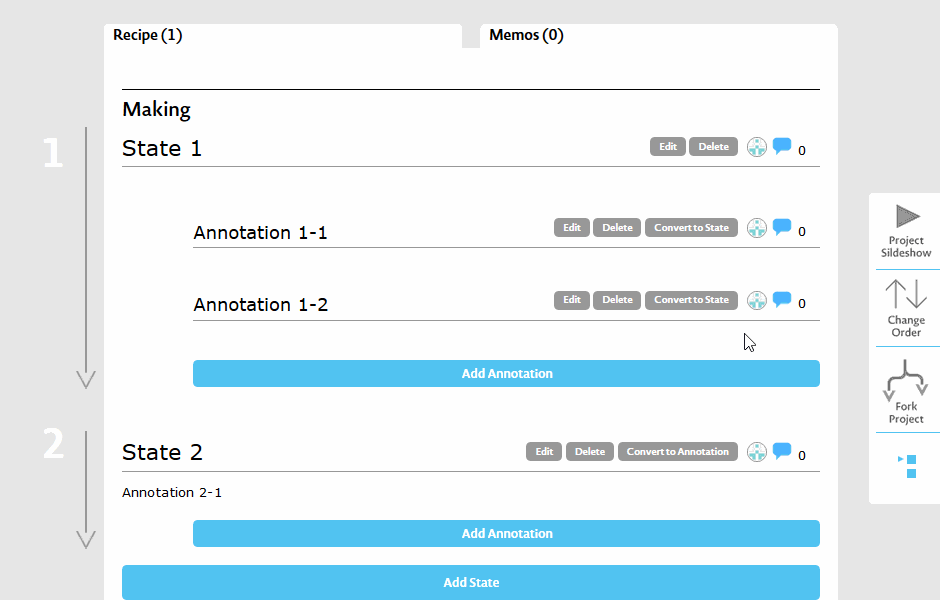
The order of States can be changed with the "Change Order" button.
To convert between State and Annotation, use the "Convert to State" and "Convert to Annotation" buttons.
To convert between State and Annotation, use the "Convert to State" and "Convert to Annotation" buttons.
Description of Usage
At the end of the recipe, write down how to use the product as Usage.
It is effective to shoot a movie and post it.
It is effective to shoot a movie and post it.
Add a Youtube Video

Once you upload the movie file to your Youtube, select the 'Add Youtube Video' and Input the whole long URL of Youtube.
Short URL is not acceptable.
Short URL is not acceptable.
Write a memo
You can use the memo freely. You can upload the status of production like a diary and write down the state of trial and error.
The method of description is the same as State and Annotation, but there is no limit on the number of characters, so write as much as you want.
The method of description is the same as State and Annotation, but there is no limit on the number of characters, so write as much as you want.