Step 0: Preparation
- Measure the size of your bookshelf
- Decide the setting (In our case, we use three cut corner file cases and two books)
- Prepare all materials
Hardware Materials
Arduino Uno x1
DC 5V 2.0A Converter Power Supply Adapter x1
Servo Motor (Tower Pro SG5010) x5
Battery holder x1
Breadboard x1
Jumpwires (multiple)
10kΩresistors x5
Push button switch x5
Tape and super glue
DC 5V 2.0A Converter Power Supply Adapter x1
Servo Motor (Tower Pro SG5010) x5
Battery holder x1
Breadboard x1
Jumpwires (multiple)
10kΩresistors x5
Push button switch x5
Tape and super glue
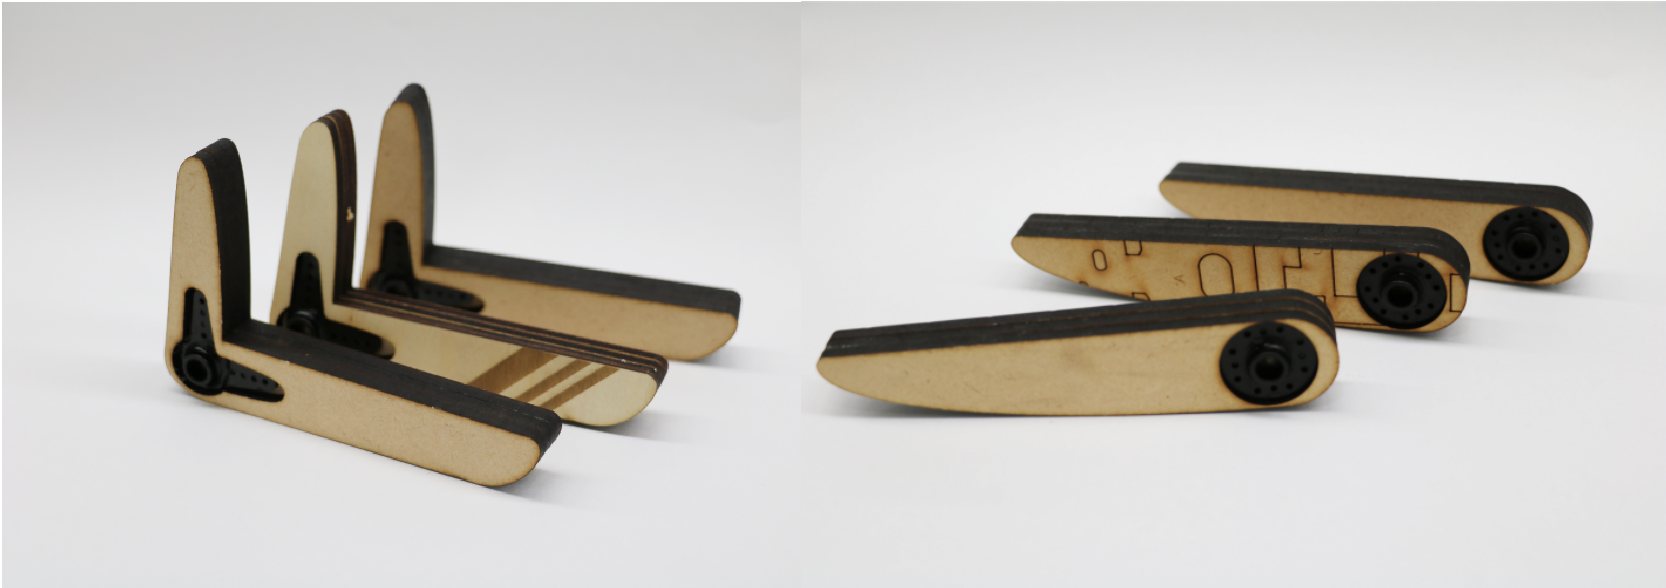
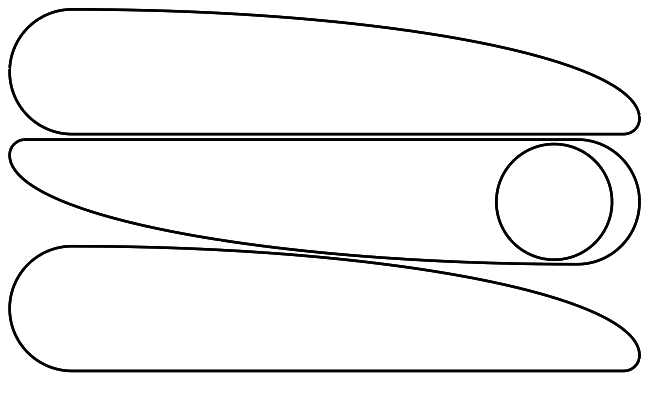
Step 1: Design the Arms

Step 2: Soldering the switches
See reference video for details
Step 3: Make a Container
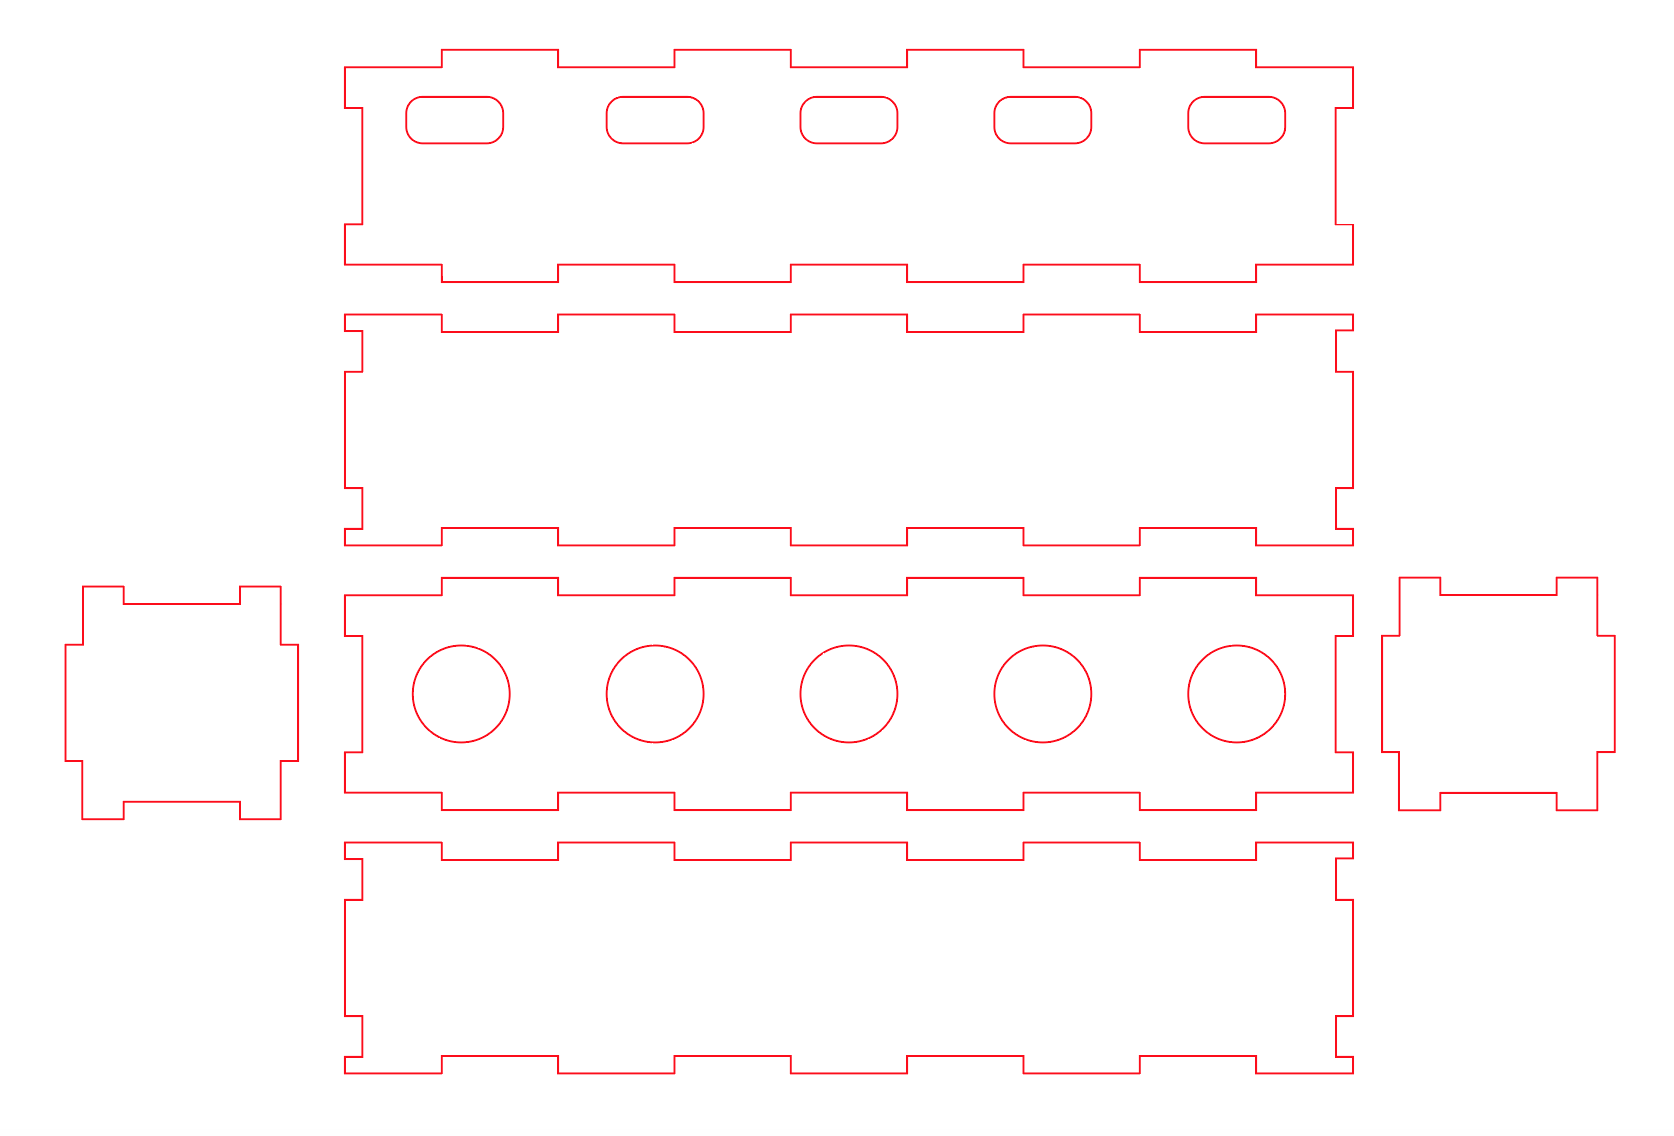
- Measure the size of the button
- Draw the box on illustrator (make sure there's enough space to place on the shelf and space for breadboard, arduino and batteries. )
- Cut with laser cutter
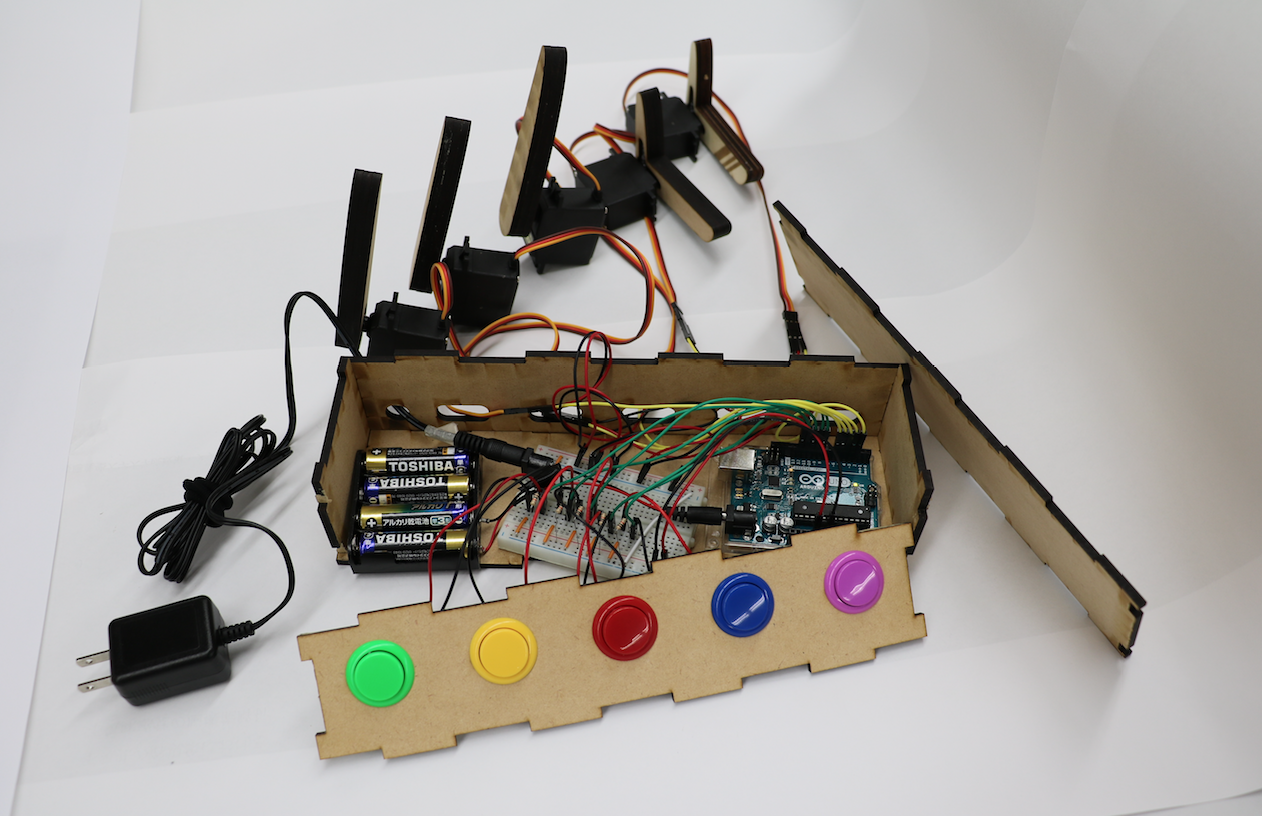
Step 4: Build Up
- Write the codes and set the angle of the arm movement
- Upload it to Arduino
- Build up according to this set-up graph, see the video for more details
Step 5: Final check up

Make sure that
- all buttons work,
- everything fits in the box,
- wires are long enough, and
- cable can reach the plug.
Step 6: Final Set Up

- Set up the motors according do your bookshelf's setting
- Use tape to set to the position first
- Make sure each arm and motor work
- Use super glue to stable the motors!