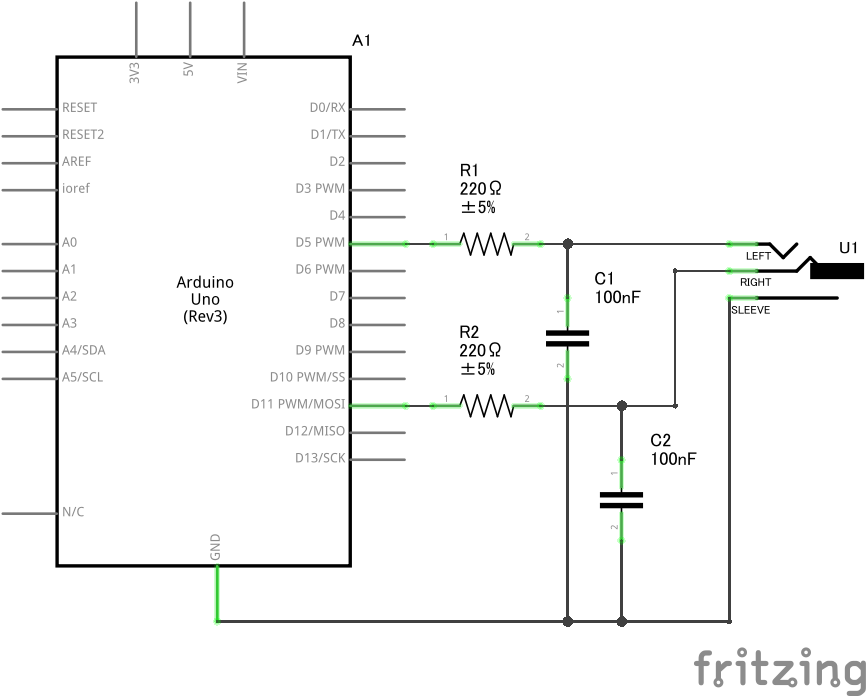
ハードウェアの構成
推奨回路
- 図を参照(RC回路による1次LPFでPWM出力をなまらせている)
概要
- USBケーブルでPCと接続し、USBシリアルで制御(38400 bps)
- D5(L)、D11(R)ピンから62.5 kHzの単極PWMで、ラインレベルのオーディオ出力
- USBからのノイズを減らすため、ACアダプターの使用を推奨
部品リスト
- A1:Arduino Uno Rev3
- U1:オーディオジャック(3.5 mmステレオミニ)
- R1, R2:220 Ω抵抗
- C1, C2:100 nFコンデンサ
- ジャンパー線
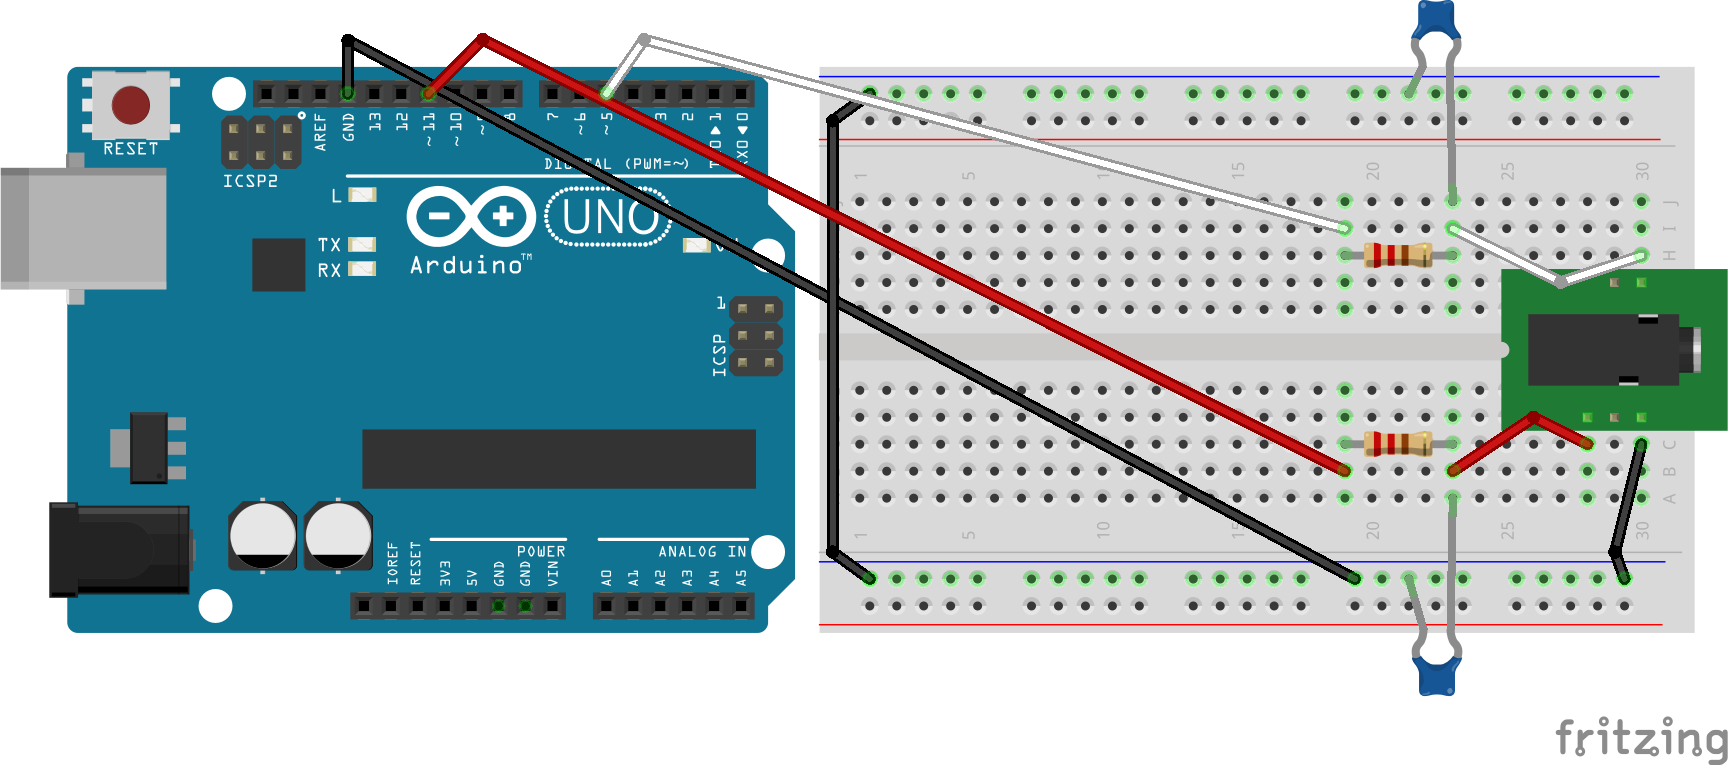
実際の配線例
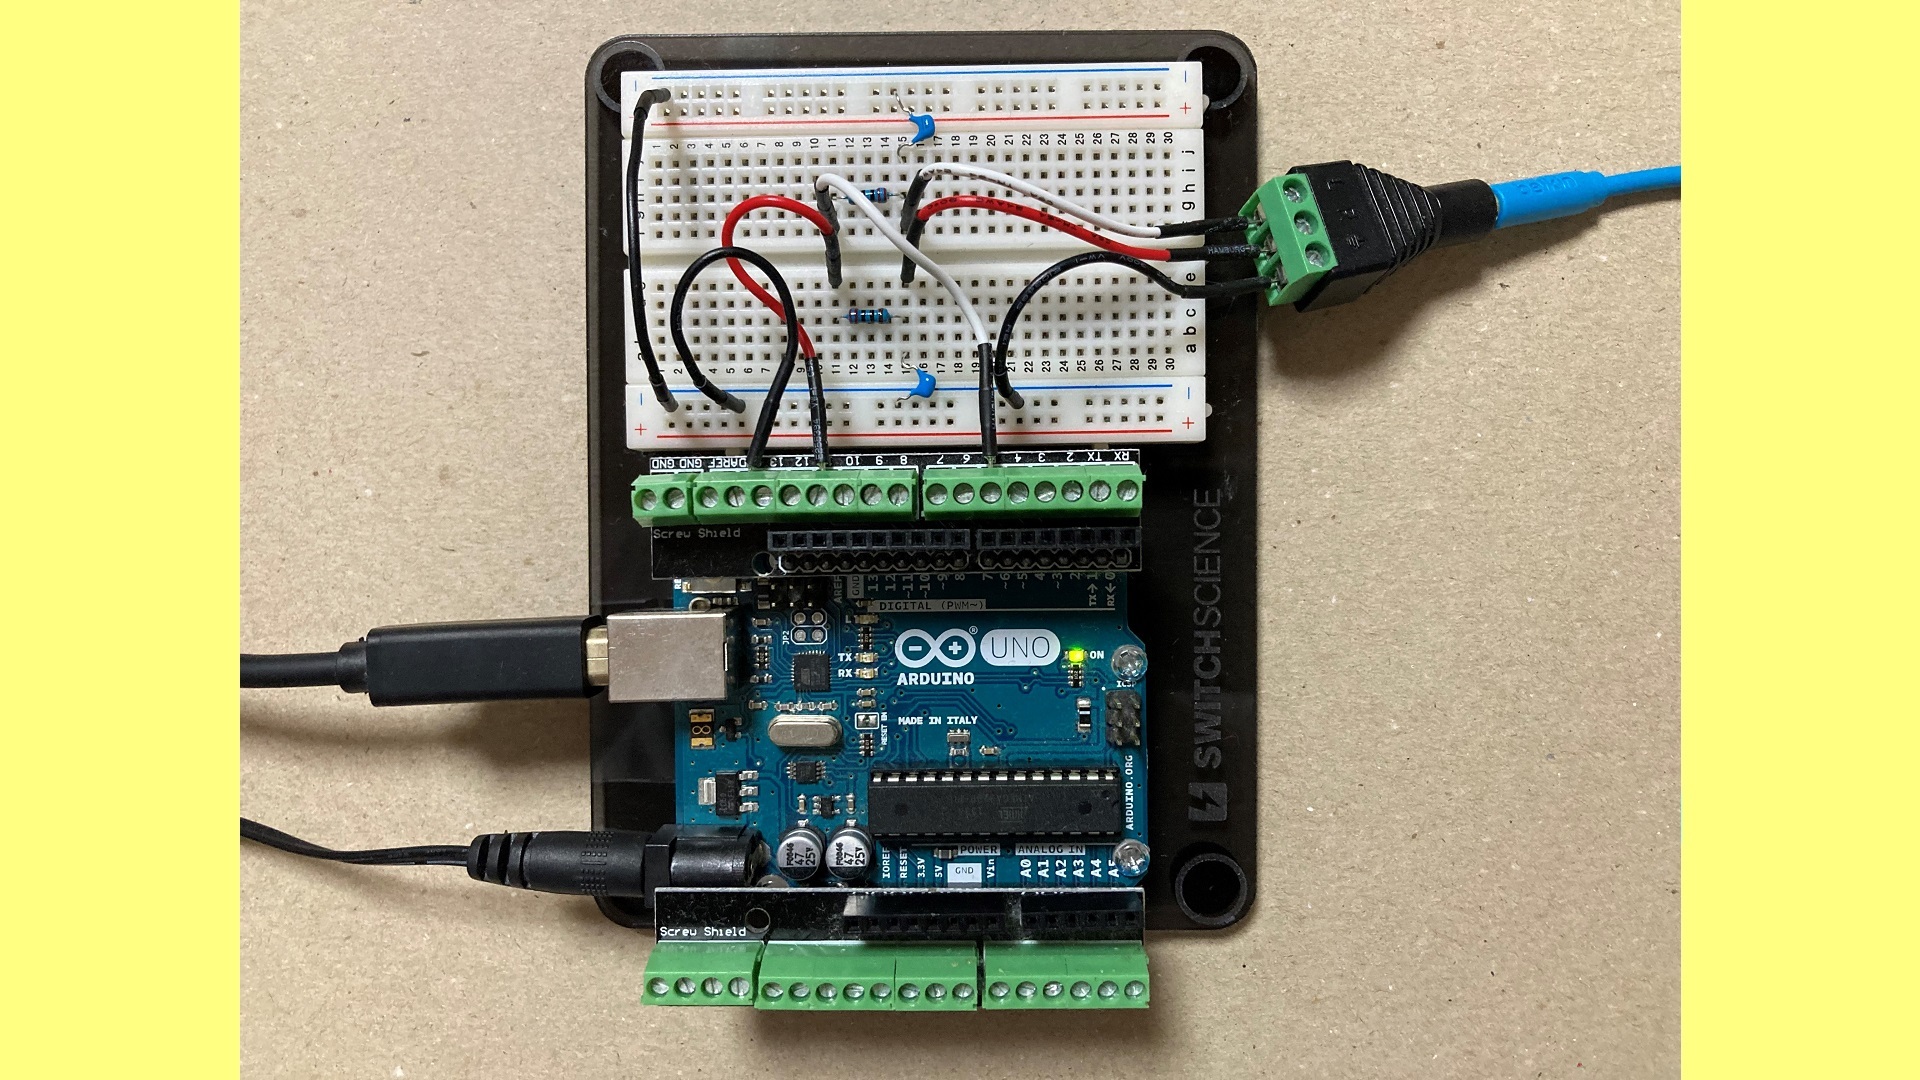
- Arduinoからオーディオ出力(L、R)とGNDを引き出す(写真では、ネジシールドを使用)
- オーディオジャックは、写真のような「ネジ留め式」のタイプがオススメ(ハンダ付け不要)
別構成:MIDIシールドを使用
- スケッチで#define SERIAL_SPEED (31250) を有効にすると、MIDIシールド(またはMIDIブレークアウトボード)を使用可能
- USBのノイズを排除でき、音質もアップ
ソフトウェアのインストール
- https://github.com/risgk/digital-synth-vra8-q/releases/latest からスケッチをDL、展開、"DigitalSynthVRA8Q.ino" をArduino Unoに書き込む
- https://projectgus.github.io/hairless-midiserial/ からHairless MIDI<->Serial BridgeをDL、展開
- https://www.tobias-erichsen.de/software/loopmidi.html からloopMIDIをDL、インストール
Arduinoのバージョンについての注意
- 正常動作のために、Arduino AVR Boardsコア1.8.3の使用を強く推奨
USBシリアル制御の準備(Windows用の説明のみ)
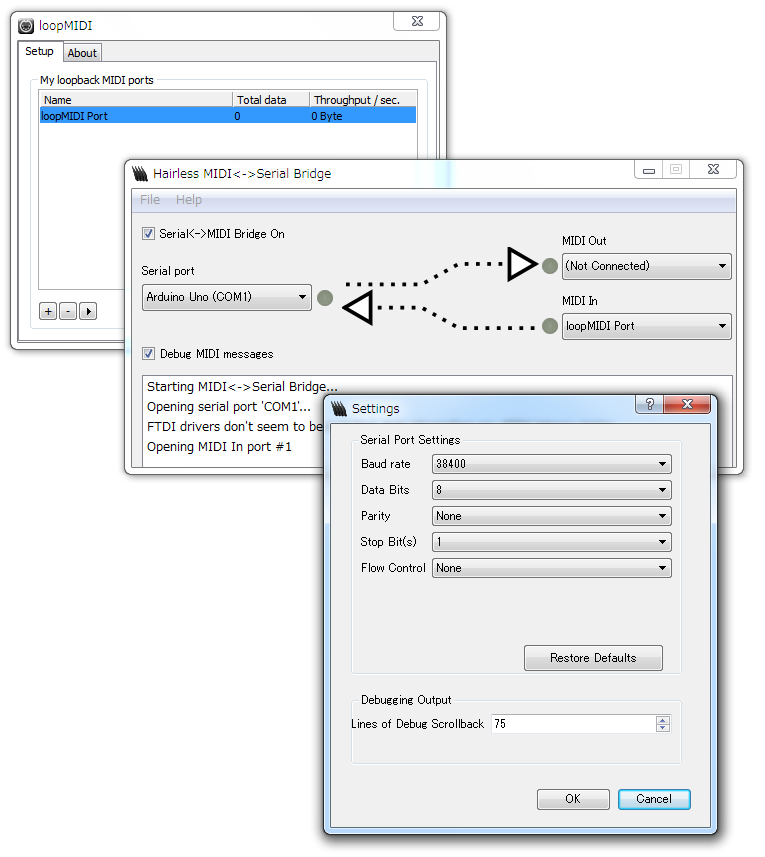
- 以下の設定は、MIDIシールドを使用する場合には不要
- loopMIDIを実行
- Hairless MIDI<->Serial Bridge("hairless-midiserial.exe")を実行
- Serial PortでArduino Uno (COM*) を選択
- MIDI InでloopMIDI Portを選択
- [File] > [Preferences] > [Baud rate] を38400 bpsに設定