HiLo Clothes Dryer

Created Date: 2015-06-06/ updated date: 2015-06-22
Owner & Collaborators
License
Summary
Inspired by a great hanging dryer, but put off by high cost and long distance shipping, I decided to make
my own, low-budget version. There are components that could be higher quality, and prices are indicative
only - it depends what your local suppliers have available for you. I got most of the components from
Bunnings and Pete’s Emporium in Porirua (NZ).
I also decided to do something Low Tech instead of designing with digital fabrication in mind. Some simple tools and you're away with this project.
Take as much time as you want to. I made this over two weekends, not rushing, and in between other activities. But I don’t have to tidy up if I don’t feel like it...
Fineprint:
All measurements are in millimetres unless otherwise stated. All attempts have been made to keep
jargon to a minimum. ‘Usual’ in New Zealand may not be ‘usual’ globally. Do everything safely. The instruction pages are in the Memo section, not the Recipe section.

Memo

Steps, page one:

posted by FabLabWgtn on June 06, 2015

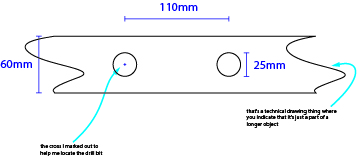
As above, measure and drill 15 holes in both pieces of plywood with the forstener bit or spade bit. I spaced them 110mm apart (from the centre of each hole) and in the centre of the 60mm plywood, marking the centre for each hole with a cross. That’s a lot of centres. I made the holes 9mm deep.
Chamfer all edges (or get rid of the sharp edges) with the 150grit sandpaper and take the burr (scratchy bit) off the holes with the 240grit paper. Check the fit.
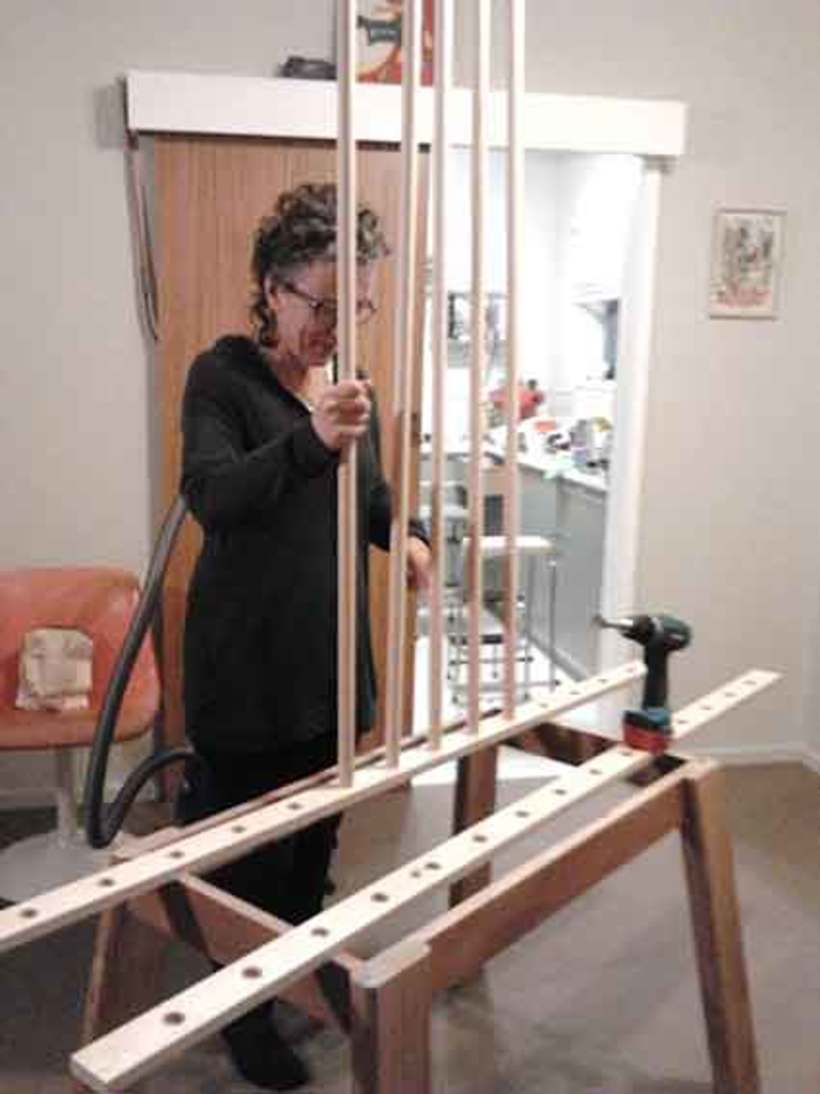
On the broom handles, measure 450mm and 900mm along the length. Mark with a pencil, dividing the handles in three.
Cut with your handsaw. Don’t worry too much if they aren’t exactly the same length but try to get them close. They are now your dowels.
Smooth the sawcut edges with the 240grit sandpaper.

Comments