
Steps, page six:
posted by  FabLabWgtn on June 06, 2015

Hang the pulleys from the screw hooks in the ceiling.
It might be quite handy to have someone else helping you with this next bit:
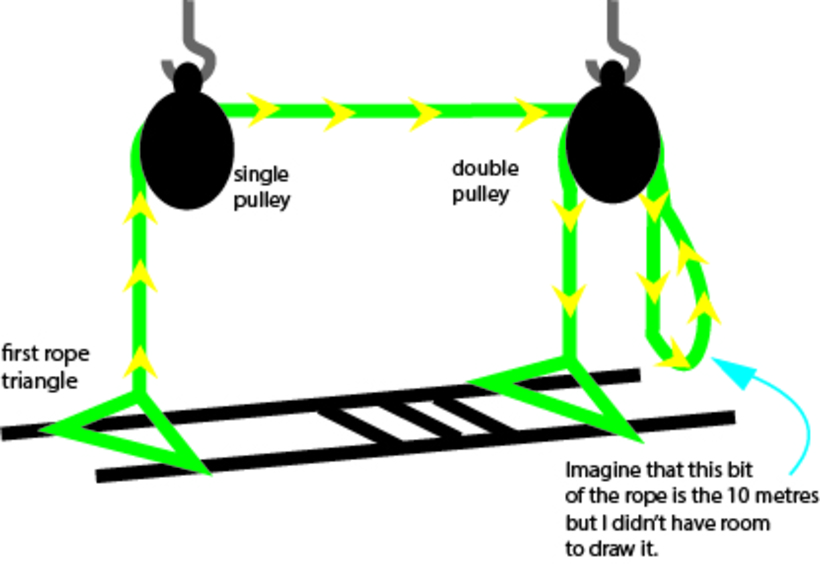
Pretend that I’ve drawn an awesome picture and then look at the photo above.
Don’t get distracted by bizzarre scale, colour or other detail - it’s the rope that is important here.
It’s green with yellow arrows on it.
If you follow the arrows on the drawing, you can see that the long end of your rope needs to be threaded through both pulleys and then back through the double one.
Then you can thread that end through your other two eye hooks on your ladder/frame and tie the 2nd triangle.
Make sense? If not, maybe you could talk about it with that handy someone else.
It might be quite handy to have someone else helping you with this next bit:
Pretend that I’ve drawn an awesome picture and then look at the photo above.
Don’t get distracted by bizzarre scale, colour or other detail - it’s the rope that is important here.
It’s green with yellow arrows on it.
If you follow the arrows on the drawing, you can see that the long end of your rope needs to be threaded through both pulleys and then back through the double one.
Then you can thread that end through your other two eye hooks on your ladder/frame and tie the 2nd triangle.
Make sense? If not, maybe you could talk about it with that handy someone else.