ArduinoとProcessing

Owner & Collaborators
License

ArduinoとProcessing by FabLabMinatoMirai is licensed under the Creative Commons - Attribution license.
Summary
Materials
Tools
Blueprints
Making
基本
0
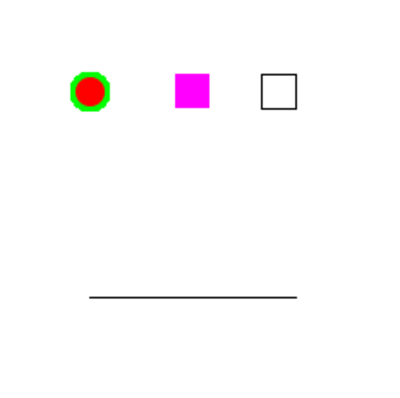
- processing_animation.pdeをダウンロードしてください。アニメーションの基本が書かれているので、参考にしてください。基本は描画→消す(画面を白く塗りつぶす)→座標や色を変えて描画を繰り返しているだけです。
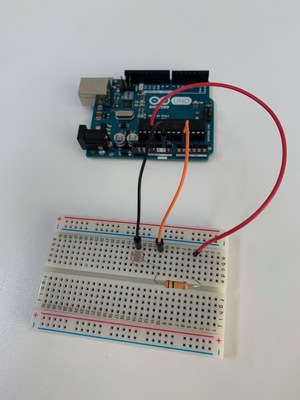
- Arduinoの明るさセンサー(CdSセル)から値を読み取って、シリアル通信でProcessingで読み込み例を扱ってみます。write_to_processing.inoをダウンロードして、Arduinoに書き込みましょう。Arduinoの配線はここのCdSセルの配線をしてください。

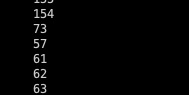
- read_from_arduino.pdeをダウンロードして実行してみましょう。step3の配線をした上で、USBでPCとつなぎ、myPort = new Serialの行のCOM3の部分は自分のPCにあった適切なポートに修正してください。実行すると、コンソールにセンサーからの値が表示されます。


References
Usages
Project comments

Comments